Please ensure Javascript is enabled for purposes of website accessibility
Keep It Cool On The Course

Keep It Cool On The Course

Keep It Cool On The Course

Keep It Cool On The Course

Here in Florida, where heat indexes can exceed 100 plus degrees, the on-set of heat related illnesses should be a matter of concern from a health and performance standpoint particularly for children.  With the advent of golf carts, most adults enjoy a reprieve from the effects of the heat; however most tournaments and golf courses for that matter require the child to walk with their bag.  During my days of junior golf, I remember playing the Big I Junior Championship in Nashville, Tennessee.  Temperatures reached upwards of 105 degrees Fahrenheit and before the tournament was over three children were hospitalized with heat exhaustion.  Knowing the signs and symptoms and taking the proper precautions can not only save your child’s life, but improve performance as well.

Parents should be aware that children are more prone to dehydration and heat illness than adults.  This is for a number of reasons.  Children have more body surface area per pound of weight causing a greater heat gain from the environment on a hot day.  Children produce more metabolic heat per mass unit than adults during activities like walking a golf course and children don’t sweat as much as adults hindering the body’s ability to cool itself.

The nervous system is responsible for maintaining a healthy body temperature, but when the temperature rises too much and the body cannot transfer enough heat to the skin to keep us cool, a heat illness can occur.  Bottom line, the higher the temperatures the greater the toll on the child.  

It is important to understand that dehydration can set in before the child becomes thirsty.  If this occurs they can expect to feel fatigue, irritable, overly hot and dryness of the mouth. After dehydration has set in the early stages of heat illness may soon follow.  Painful cramping, weakness, nausea, dizziness, loss of appetite, vomiting, chills, vision problems, excessive thirst are all signs of heat syncope and exhaustion.

Preventative measures:   

    • Enforce periodic drinking – 5 oz every 20 minutes for a child under 90 pounds
    • Enforce periodic drinking – 9 oz every 20 minutes for an adolescent over 130 pounds.
    • Add sodium chloride (salt) to the child’s flavored sport drink – a half teaspoon (1g) per 32oz sport drink. This will enhance voluntary drinking.
    • Avoid drinks with caffeine
    • Have your child use an umbrella to shade him/her from the sun
    • Drink plenty of fluid the night before and the morning of a tournament.

From a performance standpoint, it has been shown that just a 2% loss of body weight due to sweating is enough to have a considerable impact on performance. Additionally, when your body begins to thermoregulate itself, blood is taken from the working muscle to the skin to help initiate the cooling process. As a result, the individual’s heart rate will increase making the chances of draining that four foot putt to force a playoff even that much harder.

Unfortunately, there are times when the initial stages of heat illness go unseen and the full blown effects of dangerous illness like heat exhaustion and heat stroke become painfully obvious. There are some steps you can take to help curb the symptoms of these illnesses.

    • Call for help
    • Take the child to a cool shady area, like under a tree
    • Encourage the child to drink plenty of liquids (water, Gatorade, etc.)
    • Remove any heat retaining clothing
    • Cool them with cold towels on the forehead or back of the neck
    Cool them by fanning them

While golf cannot be compared the physical demands of sports like football, it is an outside sport non-the-less making its competitors subject to the dangerous exposures of the sun. Taking the proper precautions may help keep your child safe and may even give them an advantage over the rest of the field.

Perfecting Your Golf Swing

Perfecting Your Golf Swing

Perfecting Your Golf Swing In Palm Beach Gardens

One of the more common shoulder injuries for golfers is shoulder impingement. This can be particularly troublesome in the backswing of the lead arm. When impingement occurs, the rotator cuff muscles (supraspinatus) and bursa become inflamed as they get pinched between the head of the humerus and the acromion. This can occur for many reasons but to avoid hurting yourself in the gym there are some lifting rules you will want to follow.

Rules For Improving Your Golf Swing:

    • Avoid lateral raises or side shoulder raises past 90 degrees of shoulder abduction. That is, don’t let the hands rise past shoulder height when doing the exercise.

    • Take the upright row exercise out of your workout routine as this movement creates the same mechanism (internal rotation and shoulder elevation) that can lead to impingement syndrome

    • Be cautious when lifting overhead. If you do any overhead lifting make sure it is done with dumbbells and not a barbell. The dumbbell will give you freedom of movement to accommodate the range of motion of your shoulder. If you have poor upper-body posture you may want to get rid of overhead exercises all together as they are not really doing much to strengthen your rotator cuff musculature or your scapula stabilizers.

    • If you love to bench and do pullups make sure you devote enough time to training the rotator cuff muscles as well. Strong rotator cuff muscles work to stabilize and depress the arm keeping a comfortable open space between the humerus and the acromion. If the deltoid and pec muscles become overdeveloped, they may overpower the smaller stabilizers of the shoulder and lead to shoulder pain later on.

If in your golf swing you are having pain in your lead arm on the backswing you may want to make sure you are not over rotating your hands in the take away. In addition you may need to create more trunk rotation to take the stress off of the lead arm as it works its way into the backswing. If you are having some pain in your shoulder, seek out a good trainer as they may be able to evaluate your current lifting program and make suggestions as to what exercises you should be doing and shouldn’t be doing.

Re-Train The Brain

Re-Train The Brain

Re-Train The Brain

Re-Train The Brain

Golf Swing Training Palm Beach Gardens

I think we have all heard the 10,000 hour or in this case repetition rule.  It takes 10,000 times of doing something to be considered an expert.  Now, I am not sure if this number is research based, but I can tell you that it will take a considerably higher number of repetitions to re-learn a certain movement (golf swing) if we have been doing it incorrectly for most of our life.

Golf Swing Lessons

Any sort of change in the golf swing requires a re-programming of motor skills.  The body has developed a certain way of learning a movement (in this case the golf swing) in accordance with the individual’s flexibility, balance, and stability levels.  More simply put, the body will always take the path of least resistance to execute a golf swing, so breaking that mold means asking the body to do exceed its comfort level.  In addition to the golf pro assigning swing drills (re programming the motor skill) to the student, the golfer must also devote some attention to enhancing the bodies level of tolerance for the new swing pattern i.e. gaining stability, strength, and flexibility.  Once this process begins, the golfer will have a much better chance of making changes on a more permanent level. 

If we hope to make a swing change proper time must be spent re-training the brain to “feel” the proper kinematic movement of the golf swing.  Next time you are at the gym, do some swing drills with your arms across your chest or using a medicine ball in between sets of resistance exercise.  Do the exercises in front of a mirror so you can get the sensory feedback you need to make sure the movement is executed properly.  

Golf Swing Exercises

Examples of some motor learning exercises include separation drills in the following sequence:

  • Seated Stability Ball Rotations – Place your arms across your chest and sit down on a stability ball with good posture (chest our, low back flat).  Practice rotating your torso from side to side while stabilizing your lower body i.e. no hip movement.  Make sure to keep your head still
  • Half-Kneeling Rotations – Get in a half-kneeling position (one knee down) and place your arms across your chest.  Begin to rotate your torso side to side keeping your lower body/knee and head still.  You may find this position difficult to maintain balance
  • Golf Stance Rotations – Get in your golf stance with your arms across your chest.  Begin to rotate your torso in both directions while you keep a stable lower body.  The challenge here will be the coordination of the movement more so than balance.  You will find your hips wanting to rotate with your upper body.
  • Lunge Stance Rotations –  The hardest of the four.  Get into a split stance (one foot out in front of the other) and hinge from the hips as if you are addressing the ball.  Practice rotating your torso in both directions while you maintain lower body stability.  The muscles of the lower body will be significantly challenged in this position.

Perform 10 repetitions for 1-2 sets in between your sets of resistance exercise.   

Mixing Up Your Cardio Routine For Golf

Mixing Up Your Cardio Routine For Golf

Mixing Up Your Cardio Routine For Golf

Mixing up your cardio routine for golf can be beneficial. If you are a regular here at a gym there is a good chance that you have been doing the same cardio routine for a while. Why not mix up your cardio routine? What if I told you that you could get more out of your workout by putting in less time on the treadmill or elliptical. Recent research has shed light on the dark days of long steady state cardiovascular training. As you have probably read in fitness magazines by now, the recent trend towards HIIT (High Intensity Interval Training) conditioning is beginning to replace the old school thought of spending long hours on the treadmill. Essentially HIIT means doing shorts bursts of higher intensity exercise followed by larger break periods. A usually work to rest ratio is about 3:1. An example of this would be sprinting on a treadmill for 15 seconds and then jumping off and resting for about 45 seconds before repeating again. This would typically last for about 8 rounds equaling 8 minutes of work. Of course for most of you sprinting is not an option but this type of training can be done on a stationary bike, the arc trainer or even walking on an incline. The key is to make sure the intensity for the 15 seconds is high. This means that the workout is going to be hard, harder than what you are used to, but it takes less than half the time.

Research has been done comparing long steady state cardiovascular training with HIIT and the results are surpising.

  1. In a case study done in Canada at McMaster University researchers compared the effects of 20 minutes of high intensity interval training (30 second sprints followed by 4 minute resting periods) with 90-120 minutes long steady state training in the heart rate zone. Subjects got the same results in oxygen utilization in both programs but the amazing thing is the interval training group actually only did 2 minutes and 30 seconds of actual work.
  2. In a more famous study known as the Tabata study, researchers found that by using an interval of 20 seconds of high intensity work and a rest period of 10 seconds for a total of 4 minutes participants were able to achieve higher V02max(aerobic capacity) and a faster heart rate recovery when compared to the group who did moderate intensity endurance training.


In summary HIIT has been shown to improve the following better than long steady state training:

  1. V02max
  2. Anaerobic Threshold
  3. Heart Rate Recovery
  4. Stroke Volume
  5. Exercise Post Oxygen Consumption (increases caloric burn at rest)
  6. Fat Loss


If you are a beginner to this type of training you may want to start with LIIT (Low Intensity Interval Training) or you may throw up…same idea just keep the intensity a little lower. 


HIIT Recommendations: 

  1. Make sure you drink plenty of water and eat about 1.5 hours before you do it.
  2. Perform the interval training after you do your strength training or you may be to tired to lift.
  3. Only do this type of training 2x’s a week as it can be strenuous.


Training Options:

  1. 2 min. warm-up
  2. 30 seconds on – hard
  3. 30 seconds off – very light
  4. 30 seconds on – hard
  5. 45 seconds off – very light
  6. 30 seconds on – hard
  7. 1 min. off – very light
  8. 30 seconds on – hard
  9. 1:15 seconds off – very light
  10. 30 seconds on – hard
  11. 1:30 off – very light
  12. 30 seconds on – hard
  13. 1:45 seconds off – very light
  14. 30 seconds on – hard
  15. 2:00 minutes – off

As you can see the rest intervals increase by 15 seconds as you progress through the rounds. Total of 3.5 minutes of hard work and 9 minutes of very light work equal 12.5 minutes of work. In the above example, the rest periods are determined based on the work time and the total time. For a more individualized program use a heart rate monitor. Figure out your heart rate max by subtracting your age by 220. Then calculate what your heart rate would be at 60% of your max heart rate. Do a 2 minute warm-up and then the 30 second high intensity interval. This time, instead of resting the allotted 30 seconds, wait until your heart rate lowers to the 60% number. When it returns to 60% go hard for another 30 seconds. After 30 seconds wait again until that number returns to 60%. Repeat this process for the duration of the program. As you do it you’ll notice it will take longer and longer to return to the 60% number. As you follow the program for a few weeks your recovery time will decrease meaning your heart is becoming more efficient at recovering from intensity of the intervals.

As always make sure to consult your doctor before undertaking any new exercise program.

Good Luck and Have Fun!!!

The “Core” Of The Matter – Part 2

The "Core" Of The Matter

The “Core” Of The Matter – Part 2

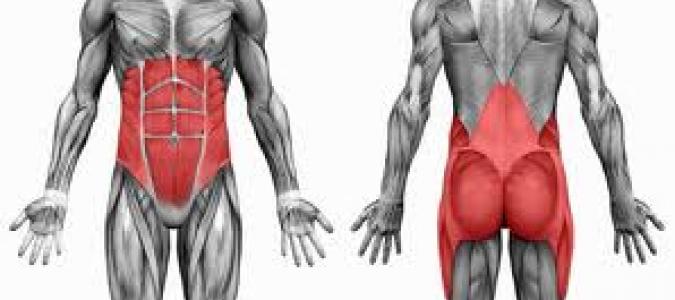
Last time I talked with you about the basics of core training, the areas of the body it involves and the purpose of the core stabilizing muscles.  The previous article served as an overview to relay to you an idea about how to safely isolate or focus on training the core.  I want to get back to a previous point I do not think I spent enough time talking about.  I had stated that the core muscles essentially transferred power from the legs to the extremities in athletic movements.  If there is extraneous movement in this area of the body then we most likely see leaks in power and force.

I would like to expand upon this not so much from an athletic standpoint but from an everyday way of life approach.  We need to think about how the body functions as a whole.  When we bend down to pick a dumbbell up with our hand its not just the bicep that is involved in lifting the item.   The lift requires a multi sensory response via the central nervous system to activate a multitude of muscles which ultimately function as a unit, not in isolation.  We need to stop thinking about muscles and need to think more about proper anatomical movement.  I remember reading a great description about how everything in the body is connected.  If we think of the muscles as the sausage then the fascia is the gut connecting the sausage links.  This interconnecting chain moves spirally and diagonally through the body and can explain why dysfunction in one area can cause pain in another.  The fascia is a web type tissue that envelopes the muscles and connects the soft tissues of the body together.  I think this description can help us understand that when we pick up that dumbbell off the floor, before the dumbbell is even in our hand, muscles in the trunk and core region are firing to stabilize our spine.  Through proper core training we are looking to enhance the speed at which these stabilizing muscles fire, the amount of muscles firing, and the synchronicity at which they fire.

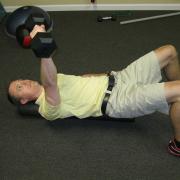
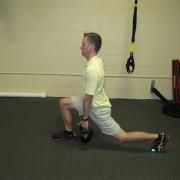
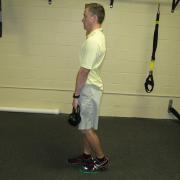
When we train the body in isolated parts like using the leg extension, leg curl or chest press or any single joint machine, we ask the body to produce a movement that it doesn’t really recognize.  This type of training is generally referred to as body building.  If we are looking for a more “functional” way of working out then we need to begin to consider changing up our routine.  I have included a few substitute exercises for some common traditional exercises.  Give them a shot…I think you will find yourself sweating a little more than normal.  This is not always a bad thing!